Monday, February 18, 2019

DIY Jute Potli Bag

Hey friend  welcome back to another DIY TUTORIAL....
Here is the project which i made:-


In the video I shared how you can transform your plain Jute Potli into your Custom designed Potli Bag.
Here is the link to the tutorial:-https://youtu.be/O2HUGW5sOrQ


Products I used:-

Jute Potli Bag- Kanak Jaipur’s Store
Metal Embellishments- Kanak Jaipur’s Store
Cherry Pollens- Kanak Jaipur’s Store
Stencil-Expressions Craft
Metallic Paints- Expressions Craft (Pearly Peacock & Emerald  Forest )
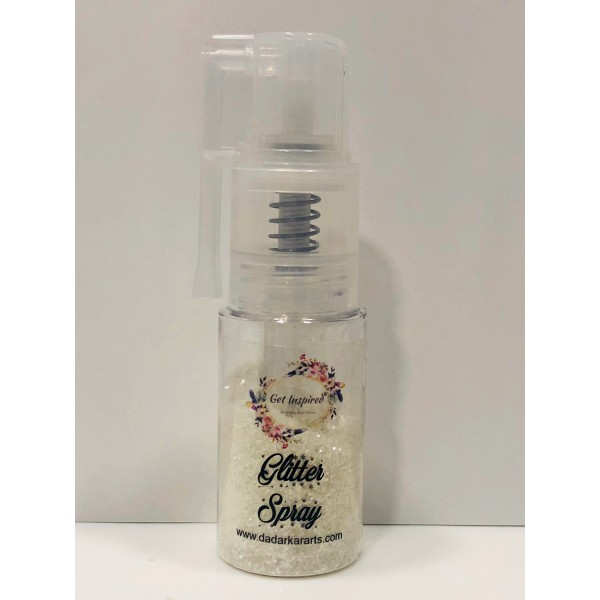
Rainbow Glitter- Expressions Craft
Flowers- Expressions Craft
Adhesive- Glossy Accents & Hot Glue Gun


Happy Ceafting🥰
-Kanika

Sunday, February 3, 2019

Valentine’s Day Card Tutorial

Hello Crafty friends❤️
I hope you are doing absolutely good...
I am back again with a lovely tutorial on Valentine’s Theme Card...
I have shared tutorial of 3 Cards...
Here is the link of the video:- https://youtu.be/7plOvk6TBGk


Materials Used:-
1. Cardstock for base
2. Distress Ink-Abondoned Coral
3. MAI Ink-Tangerine Orange
4. Archival Ink- Vermillion 
4. Stamps, Flowers & Embellishments from my stash
5. Liquid Adhesive
6. Daubers  for Inking
7. Acrylic Block for Stamping
8. Spray Bottle

I hope you enjoyed the tutorial.
Do follow us on blogger to see more tutorials...
Follow us on other social as well-


Happy Crafting 
-Kanika❤️


Friday, February 1, 2019

Valentines Collection from Dadarkar Arts

Hey Everyone🙋🏻‍♀️
As you know Love Month has started & I just received a beautiful gift from Dadarkar Arts related to their new Love Theme Paper Pack, Chipboard Cutouts, Gold Foiled Chippies, New Glitter spray & Mini Mister.

If you didn’t watched the video, check this out-> https://youtu.be/21CP_H-3Gzk


First of all I want to thank Aditi di for sending me these beauties as gift😍 The packaging was just superb as you have seen in the video already.
The paper pack name is MY LOVE... It has a very different & unique theme of colour combination.
The paper is of 270GSM so it’s very good for your Cards, Albums, Mix Media & what not!...
The co-ordinating Gold Foiled Chippies & the coloured Chippies adds on perfectly to the collection & it will enhance your projects 😍

To buy that paper click here is the link-> https://dadarkararts.com/catalouge?q=My%20love

To buy the gold Foiled chipboard cutouts, here is the link-> https://dadarkararts.com/catalouge?q=Chipboards

To buy the coloured Chipboard cutouts, here is the link-> https://dadarkararts.com/product-detail/my-love-self-adhesive-chipboard-26-pieces

To buy the Glitter Spray, here is the link-> https://dadarkararts.com/admin/uploads/product/size_large/d0b669eb54cb4c68cfbad5435061e9d9.jpg

To buy the pack of 3 Mini Misters, here is the link-> https://dadarkararts.com/admin/uploads/product/size_large/85f5acc8b76dd923c7362b0a80cf02d7.jpg

Link for the Website-> www.dadarkararts.com
I hope you enjoyed the video🥰

-Happy Crafting ❤️


Wednesday, January 16, 2019

Mix Media Visiting Card Holder

Hello friends,
I am back with another video tutorial on Expressions Studio today.
I made a Mix Media Visiting Card Holder using IMMIX Chalk Paints & Chippies.
I gave Rust & Patina Effect to my project.


Watch the video  tutorial here :- https://youtu.be/dyMKdVjKBF4


Product Links ->


 Chippies->

Luxury  Ornament Set

Wings


Chalk Paints->

Red Cherry  Wood
Aqua Marine

Micro Deco- Stones

Mini Deco Stones

Thank You for watching the video. Do participate in Expressions Craft currents month’s challenge & get a chance to win amazing gifts.

Follow us on social media handles-


Subscribe our YouTube Channel for DIY VIDEOS

Like & Follow our Facebook Page for amazing Live Session Tutorials

Follow us on Instagram to get updated first for our upcoming projects

And ya do follow us on blog for for tutorials ❤️
Thank You ❤️
-Kanika


Wednesday, January 9, 2019

Mix Media Altered Shadow Box

Hey People!...
I hope you had an amazing start for 2019❤️
I am back with another tutorial for you all on how to make Mix Media Shadow Box.
Have a look on the project  pics here:-


So let’s begin with the tutorial:-

Step 1:-
For the base I used Prika’s Raw Shadow Box that measures 6*6 inches.


Step2:-

Next step is to Cover the shadow box with white Gesso.


Step 3:-

I used IMMIX Chalk Paint Curcumin Yellow & Sprinkle Mist
Fuchsia Pink and created a background by mixing & merging the colours.


Step 4:- 

Then I am using some Chippies from a Expressions Craft & colouring them using the sprinkle list & chalk paint itself.


Step 5:- 
I just adhered the Chippies on the shadow box.


Step 6:-

Then I wanted to make it look glittery so I used IMMIX Rainbow Sparks & sprinkled 
It all over.


Step 7:-
And at last I adhered the Best Wishes Chippie and decorated it with 
Dress My Craft Sequins.


And we are done❤️


I hope you enjoyed this tutorial ☺️
Do share your reviews below and don’t forget to follow us on Social media Handles:-


And ya do follow us on blog for for tutorials ❤️
Thank You ❤️
-Kanika 


Participating in below mentioned Monthly Challenges:-


Friday, January 4, 2019

Hello friends,
Today I am back on Expressions Craft Blog to share my DT PROJECT I.e. a Diy Altered Tutorial on How To Upcycle Tape Roll with IMMIX Products. I Transformed the Tape Roll into a decorative base for my Earrings Stand and it looks very fancy.
Also do participate in their Current Month’s Challenge & get a chance to win amazing Craft Goodies from Expressions Craft.
Before beginning the tutorial I am sharing few glimpses of my project-


So, let’s start with the tutorial:-Step 1:-

I covered my Tape Roll with some embellishments and then applied a quote of White Gesso over it.


Step 2 :-
After the Gesso is dried, I am going to use IMMIX Chalk Paints- Coral Peony Atlas Blue (mentioned in above pic). 


Step 3 :-
I used IMIX Metallics & also Deco Stones to embellish it.


Step 4:- 
I had cut chipboard as per the circumference of the Tape Roll & adhered it on one side.
And then applied White Gesso & when the Gesso was dried I applied 1 quote of Atlas Blue Chalk Paint.

Step5:-

I coloured my Deco Stones Mini with Coral Peony Chalk Paint & adhered them on the edges.


At last I did some stamping on top and we are done.


I hope you enjoyed & got inspired from this tutorial.
Do share your reviews in comment box, would love to know 😇
Happy Crafting
-Kanika ❤️

Tuesday, January 1, 2019

Altered Bulb Inspirational Post

Hello friends,
I wish you a Very Happy New Year 2019.
Thank You everyone for always appreciating & admiring my work & thanks for your constant support on HANDMADE BY KANIKA.

So, here comes my first post of 2019, i.e. My Inspirational Post for Expressions Craft.
 I Altered a Bulb using the IMMIX products from Expressions Craft.

Also it has Clip on the top so you can Attach Photo/Planner?Calendar or anything you like.


I Hope that that new year brings you more happiness & love in your life.

Have a Crafty Year Ahead.
-Kanika.